
How to retrofit Ford F250/Raptor Upfitter Switches to F150 (Copy)
What are upfitter switches?
Upfitter switches or auxiliary switches open up a world of possibilities when installed in your rig. Typically reserved for commercial or heavy-duty vehicles, upfitter switches have always been popular with off-road enthusiasts. Ford started adding them to their Super Duty lineup in 2005 and in light of the recent market demand for factory “overland” vehicles, more and more manufacturers are starting to include them.
How can I get these in my F150?
My 2016 F150 did not come equipped with this sweet feature. Upfitter switches were a gift only bestowed on its better-looking cousin, the F150 Raptor. Fortunately for us plebes, Ford made the choice to include the same six-gang overhead console set up in their 2017 Super Duty redesign. Since this was a reasonably priced, standalone option (things sure have changed since then), and there a vastly more Super Dutys out there than Raptors the smart folks at F150Forum.com got together and figured out how to retrofit them into F150s.
This is not the most complicated mod out there but the way most folks have gone about it, while, is prohibitively expensive for the majority of us. At the time of publishing overhead consoles with built-in upfitter switches are going for an average of $435 on eBay before shipping and taxes. The harness that BoostedGreyGoose has created is a total work of art and makes the whole thing plug-and-play, but was not something that I could (and still can’t) spring for. So what to do?
An extensive internet search led me to these three resources:
Retrofit 2017 F-250 Aux Switch Panel in F-150 | F150forum.com
6-Switch Overhead console Retrofit for 3rd Gens | TacomaWorld
Huge thanks to Valentin, everyone at F150Forum, and Shveet for their write-ups, answers, and well-documented work.
BIG sidenote:
This write-up will not, to my knowledge, work on short overhead consoles like those equipped on XL-trim F150s. A workaround for this would be to cut into the sunglasses holder instead of into the mesh patterned part I focus on in this post. However, as long as there is enough space between the roof and overhead console for the connector and harness on the back of the upfitter switches this should be the only deviation. Basically, follow the method used by Valentin in his post F150 DIY Aux Upfitter Switches. I chose a different route because I am planning something else for the sunglasses holder . By the way, any recommendations for best-value GMRS setups? What is most popular with the overlanding crowd?
What I used:
Rotary tool or compact hack saw (I would recommend the latter for reasons you’ll read later on)
Calipers
Permanent marker
Measuring tape
Drill
Small drill bit
Hand file or sandpaper block
Superglue and activator
Tape
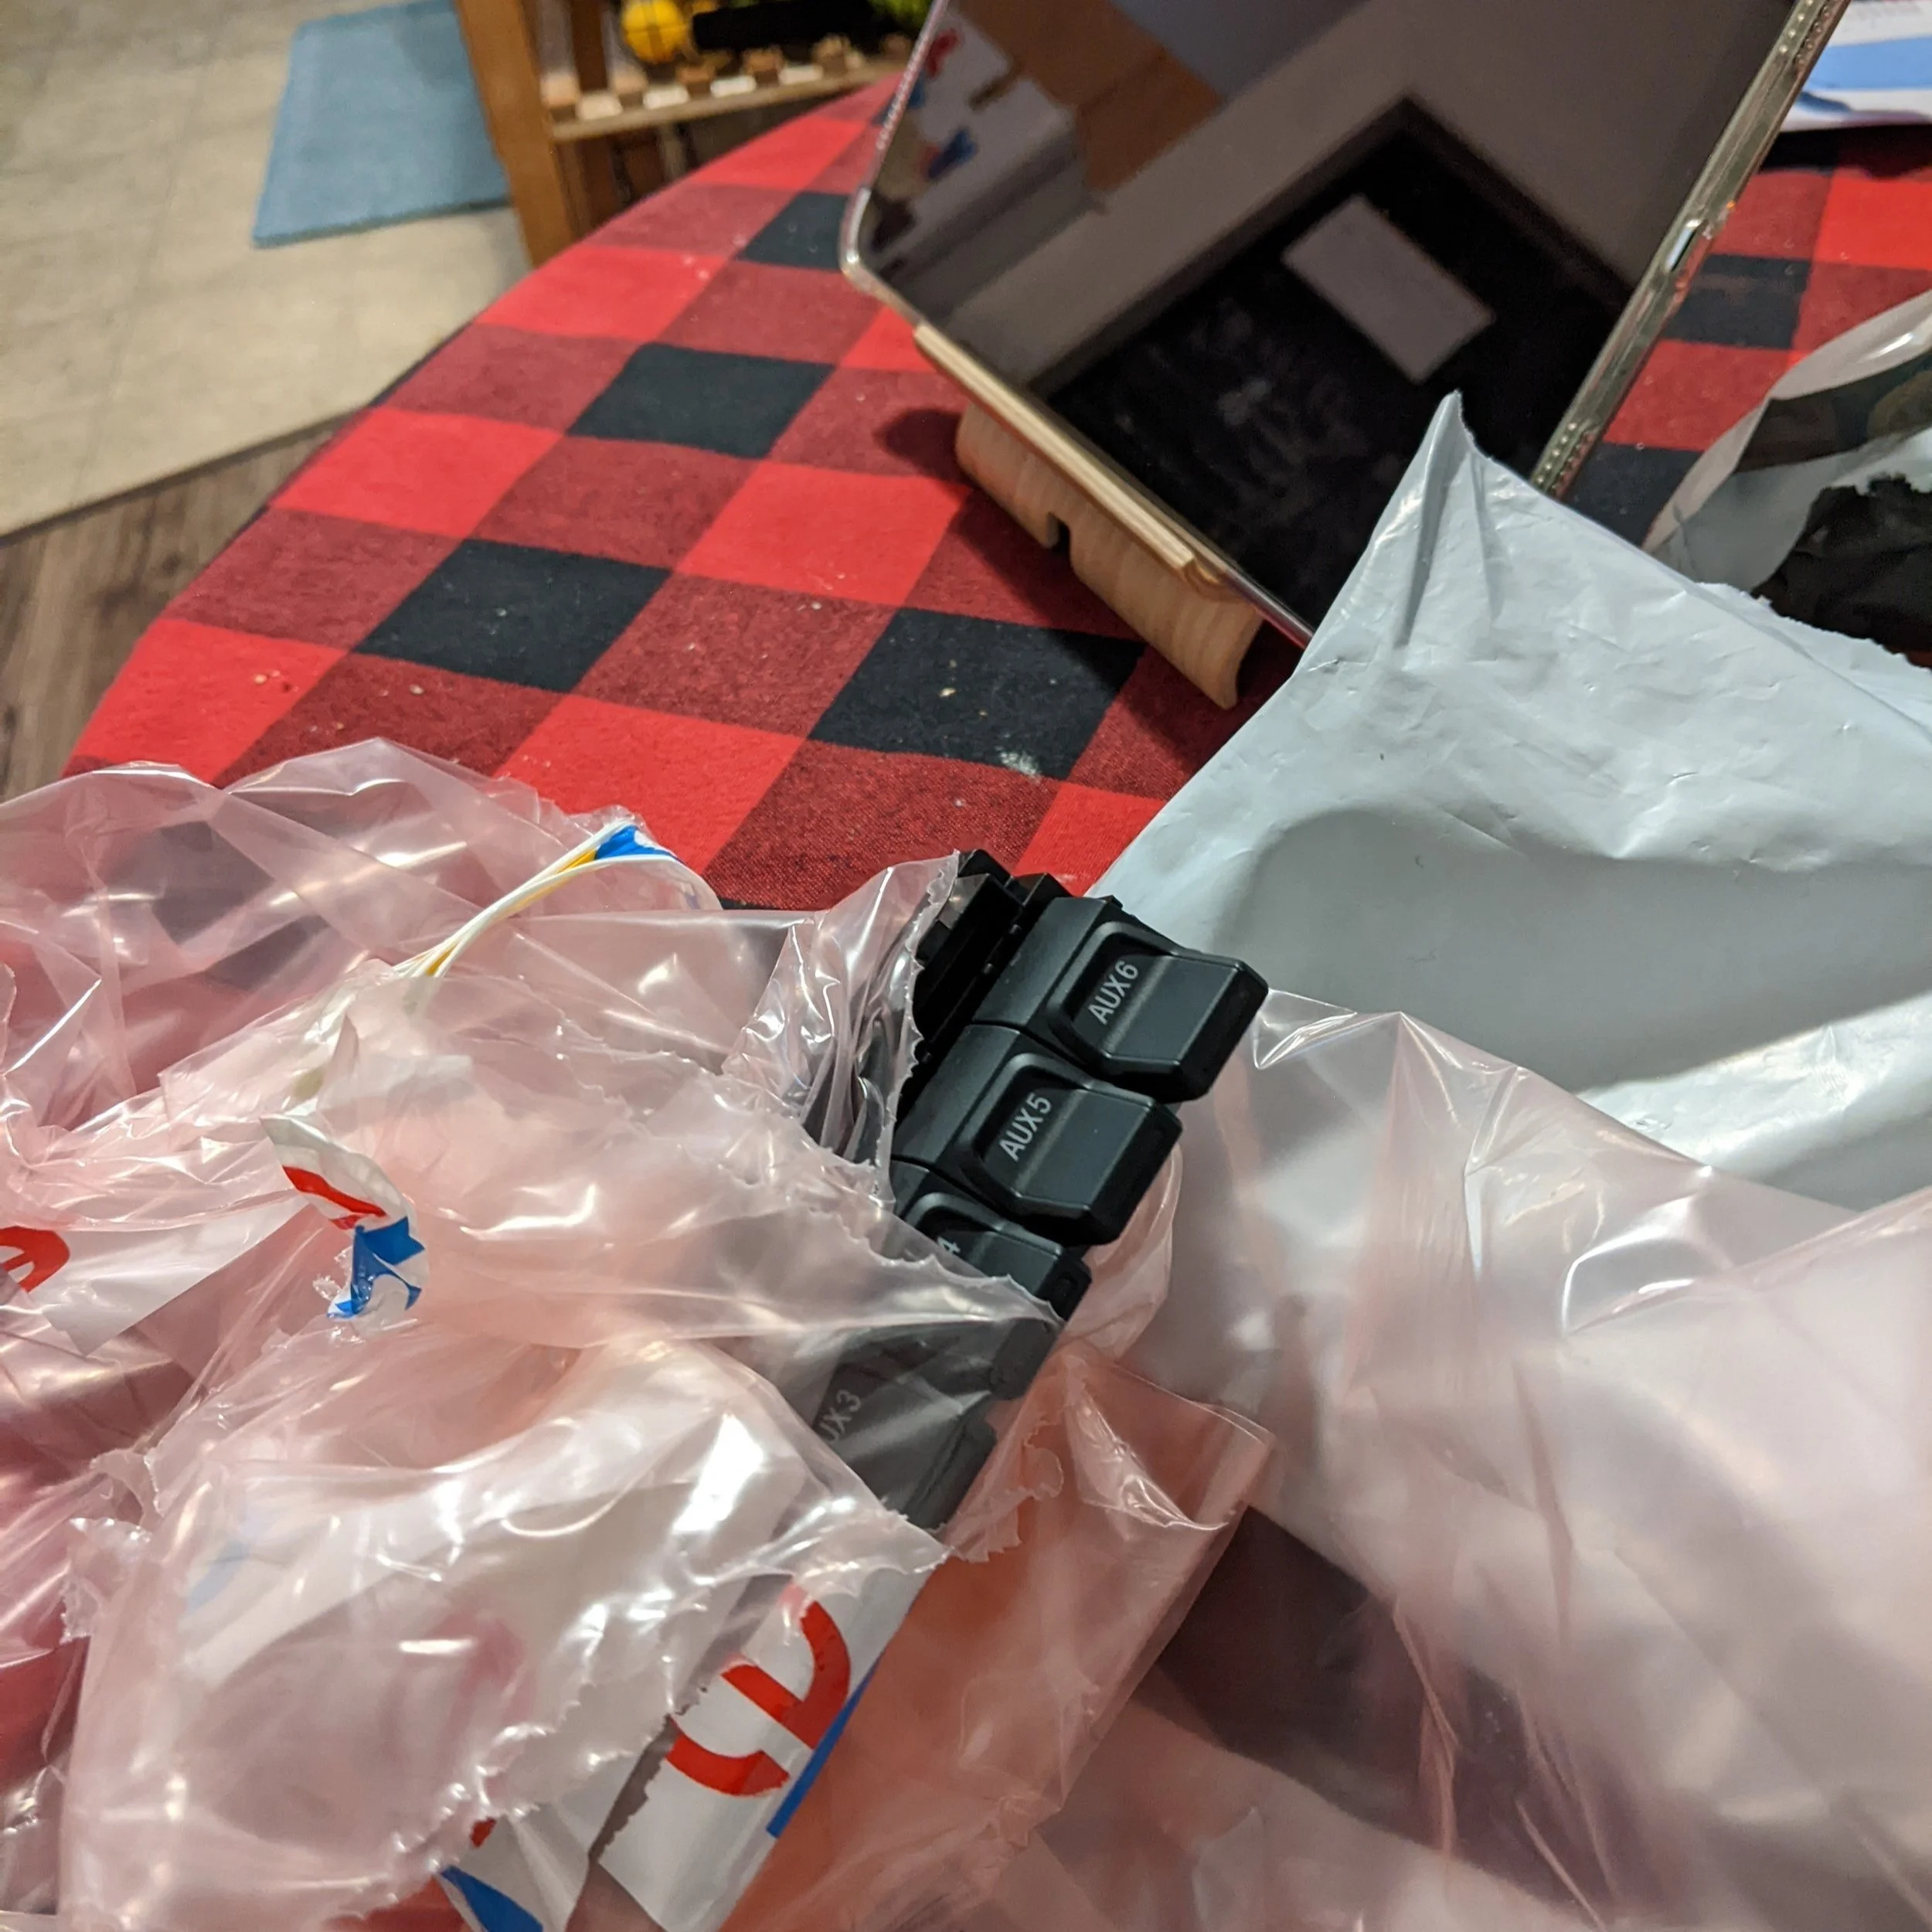
1. Gather all of your materials. I found my set of upfitter switches on eBay by searching for part number HC3T-13D734-AD or HC3Z-13D730-AA. Tasca, Ford parts suppliers, or your local dealership should be able to get ahold of this key component for you.

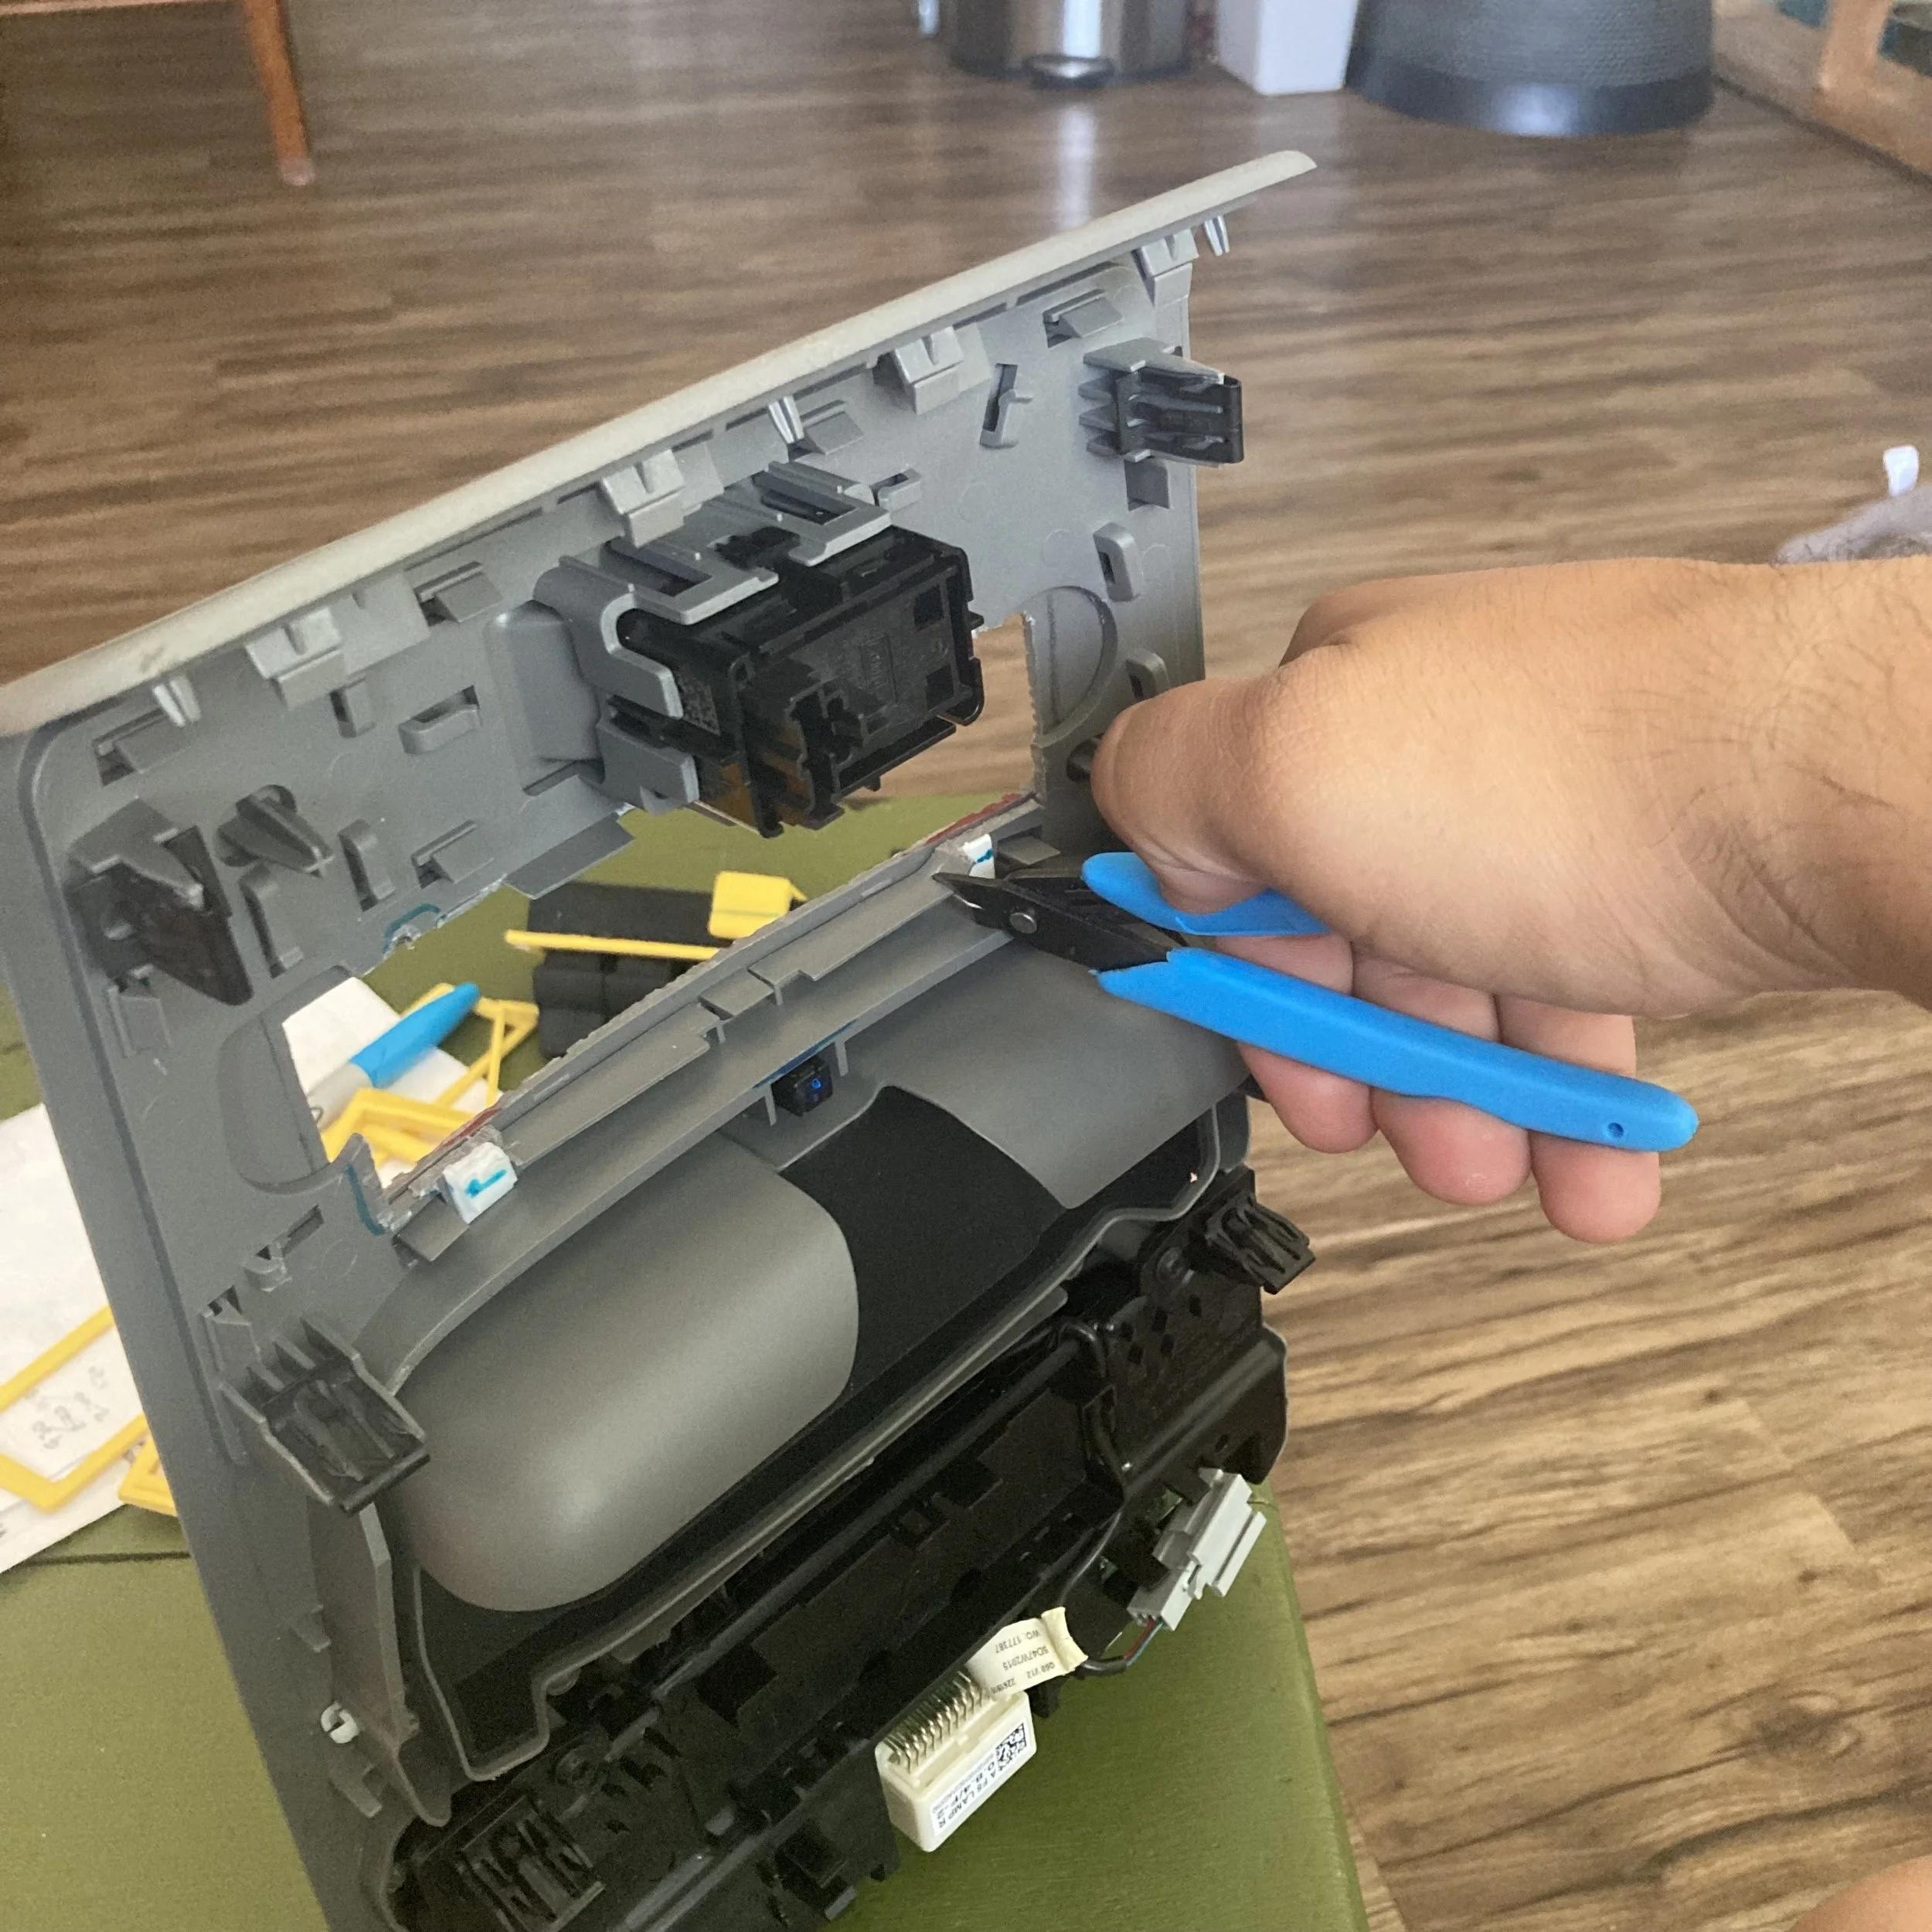
2. Remove the overhead console from your F150 by lifting the corner closest to the driver’s seat away from the roof liner. Once that corner has been liberated run your fingers along the entire edge of the console to free the other 5 clips securing it. Depending on your trim and options there might be some harnesses and connectors to unclip. Slow and steady is key here so take a breath, brace yourself, and take your time.
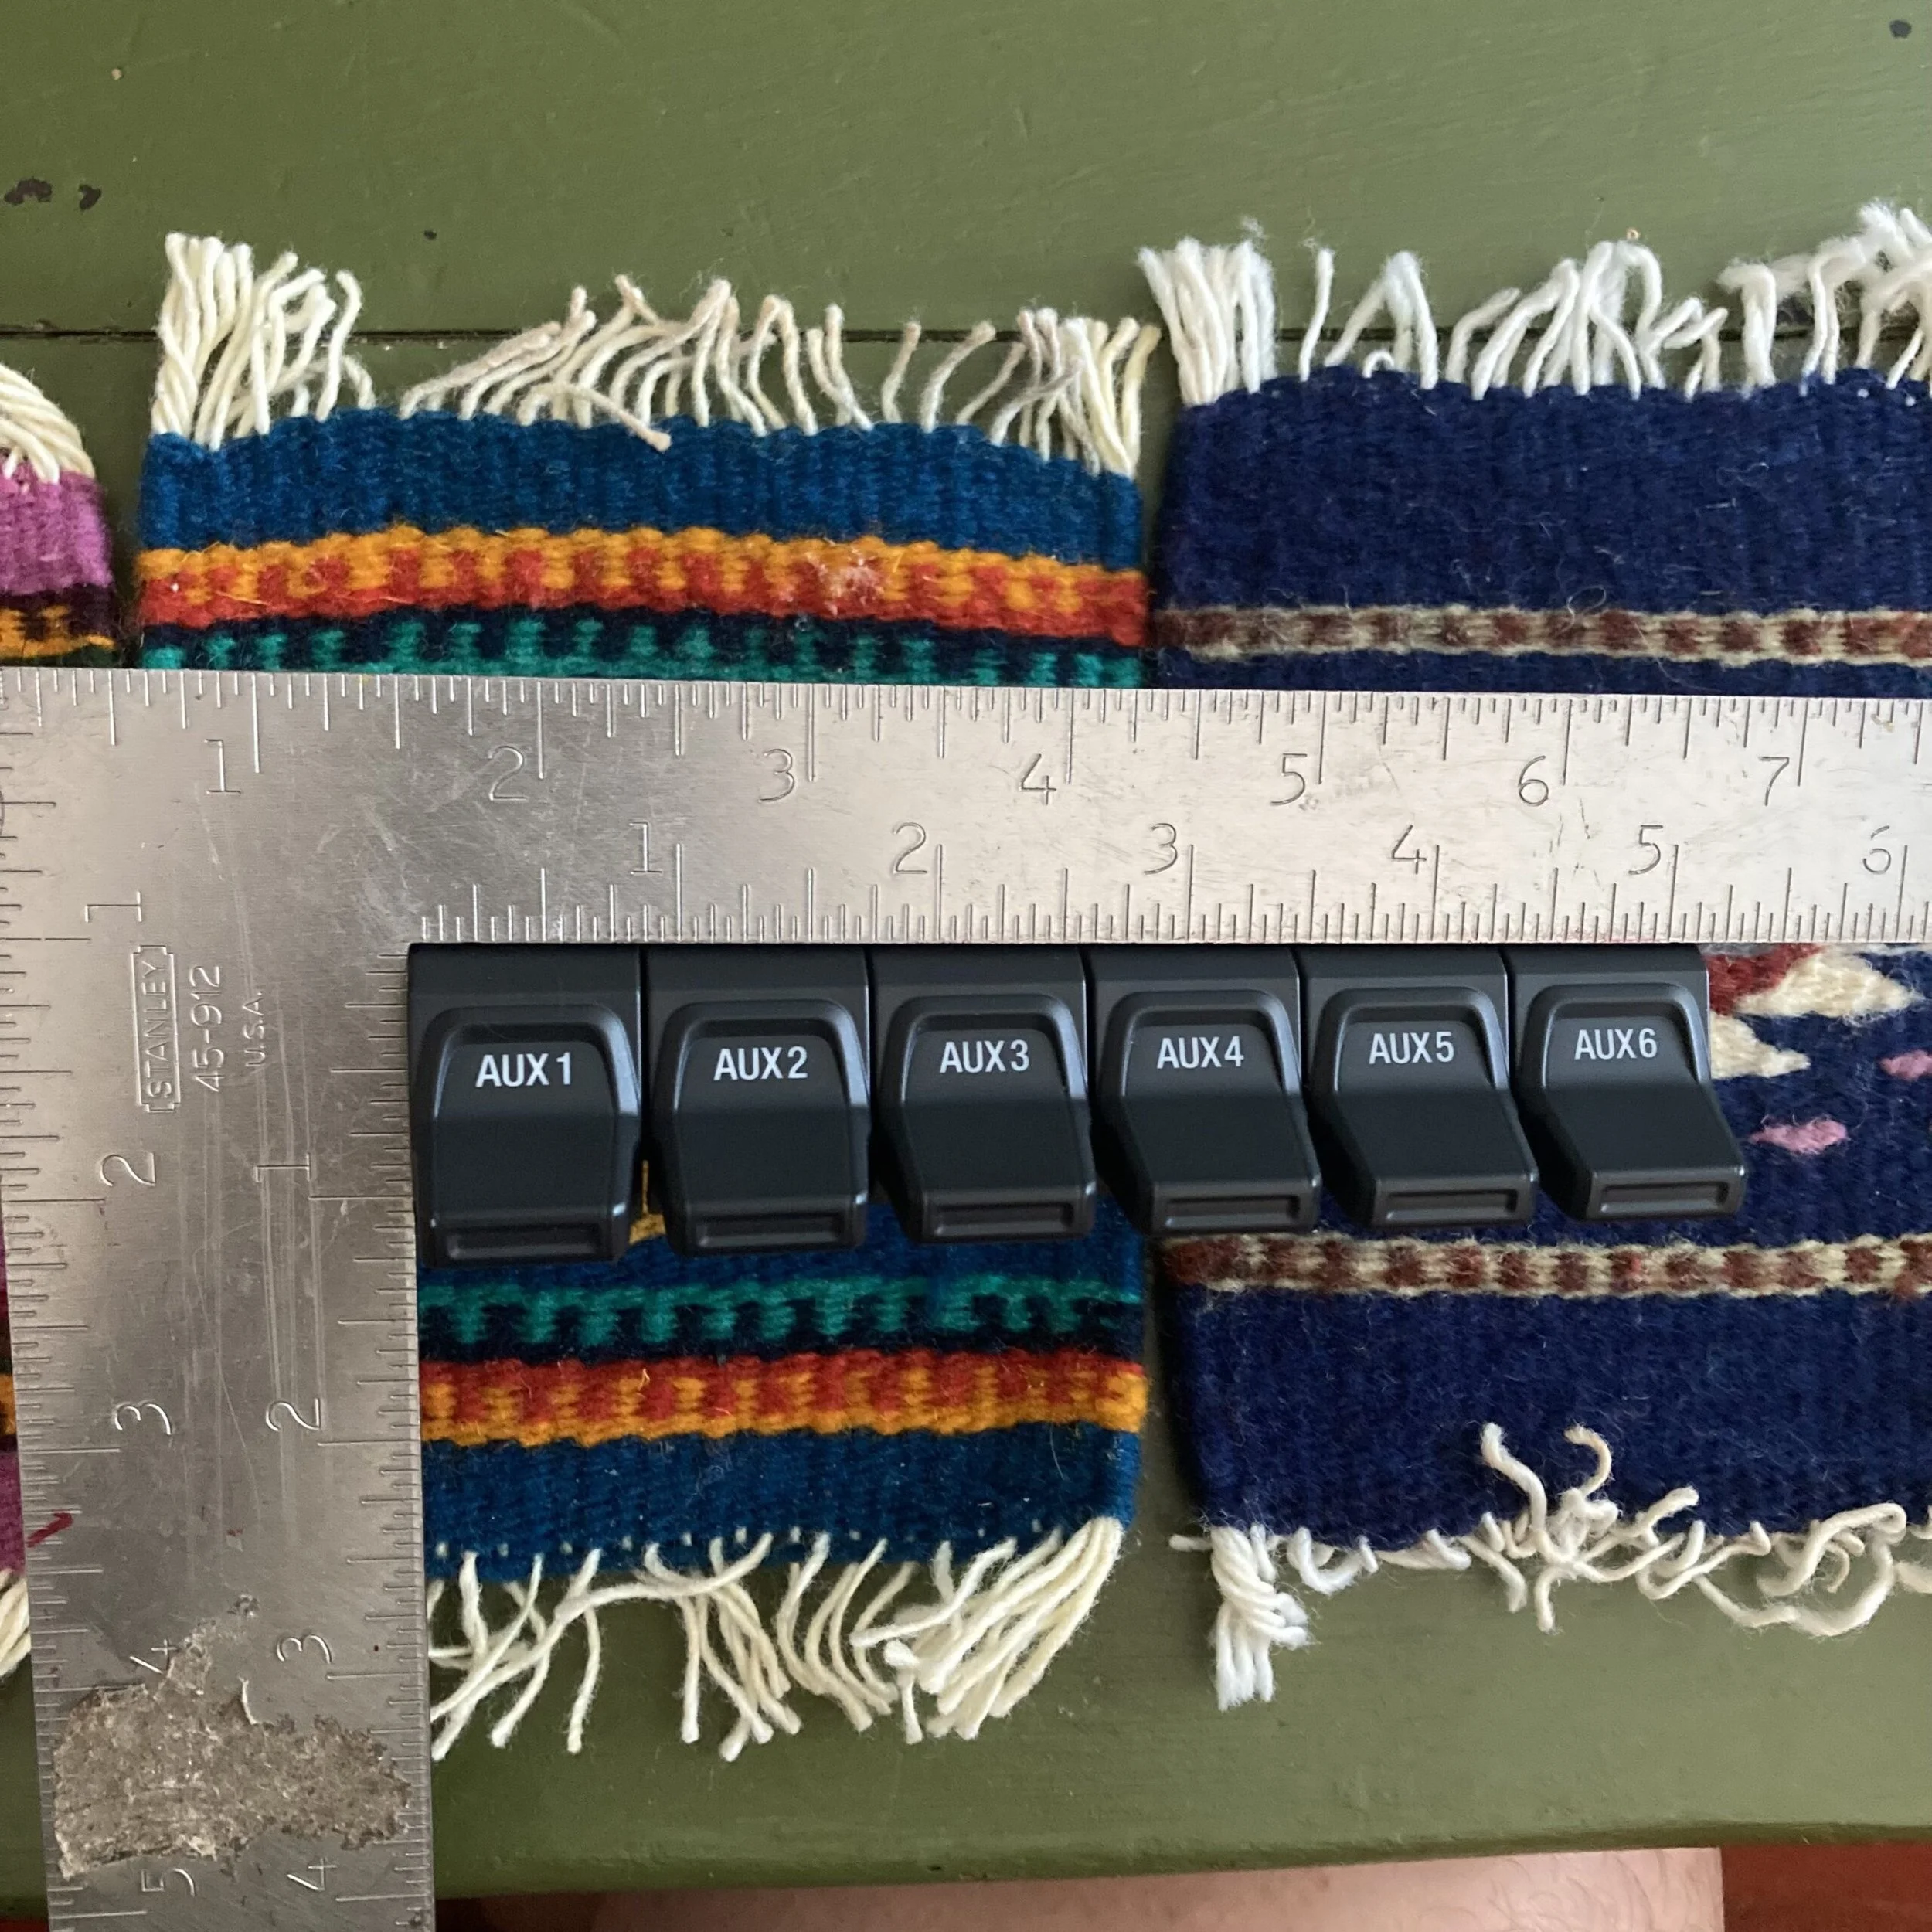
3. Time for some math. Measure the upfitter switches using a set of calipers. Make sure to measure the switches themselves and not the control box behind them.
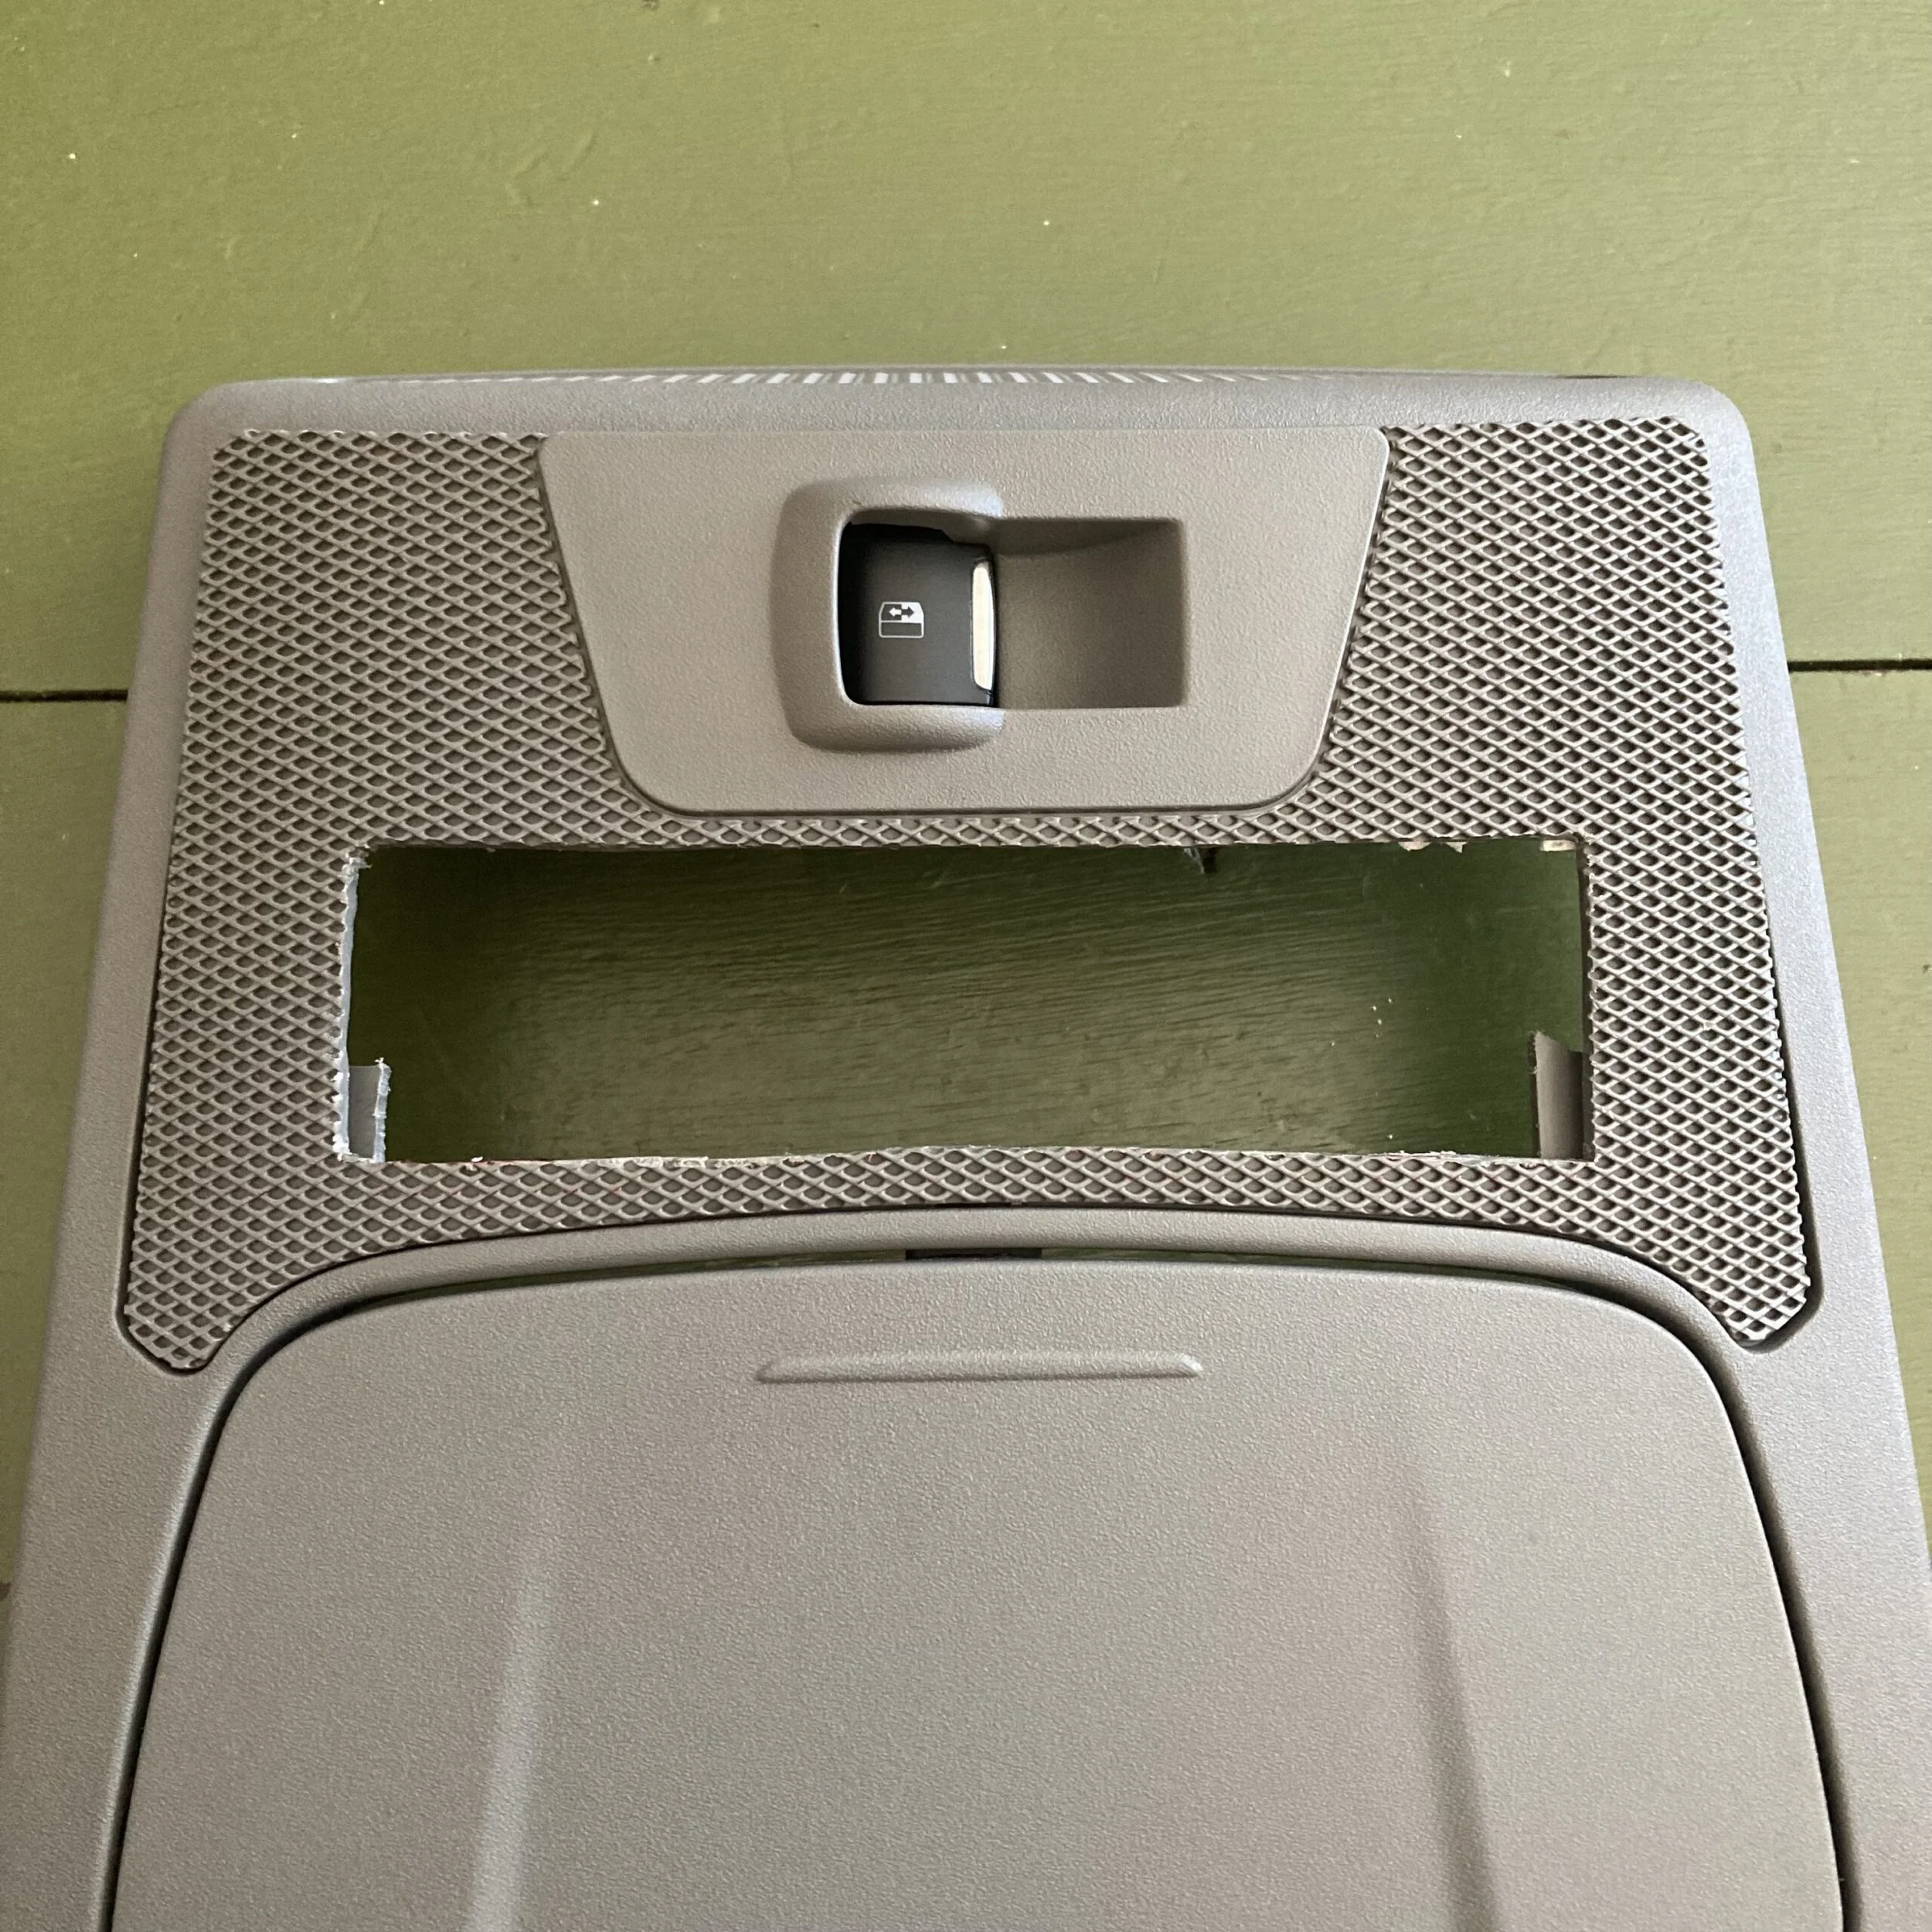
4. Using a permanent marker transfer these measurements to the mesh piece in front of the sunglasses holder. Take care to have the rectangle your measurements will create end up centered on the mesh pattern piece.
5. Flipping the console, push back and down on the clips to release the mesh patterned piece from the main console. There are 13 clips.
6. Use the drill to drill a series of holes to start your cut. A hacksaw blade and a flexible ruler as a straight edge will produce superb results. Come around with the file or sandpaper to smooth out the edges or open up the space if needed.
**I tried using a Dremel to cut this out but the heat generated by the tool melted the plastic which led to wandering (I might have used the wrong type of cutting disc). All of this led to my opening being a lot bigger than it needed to be.**
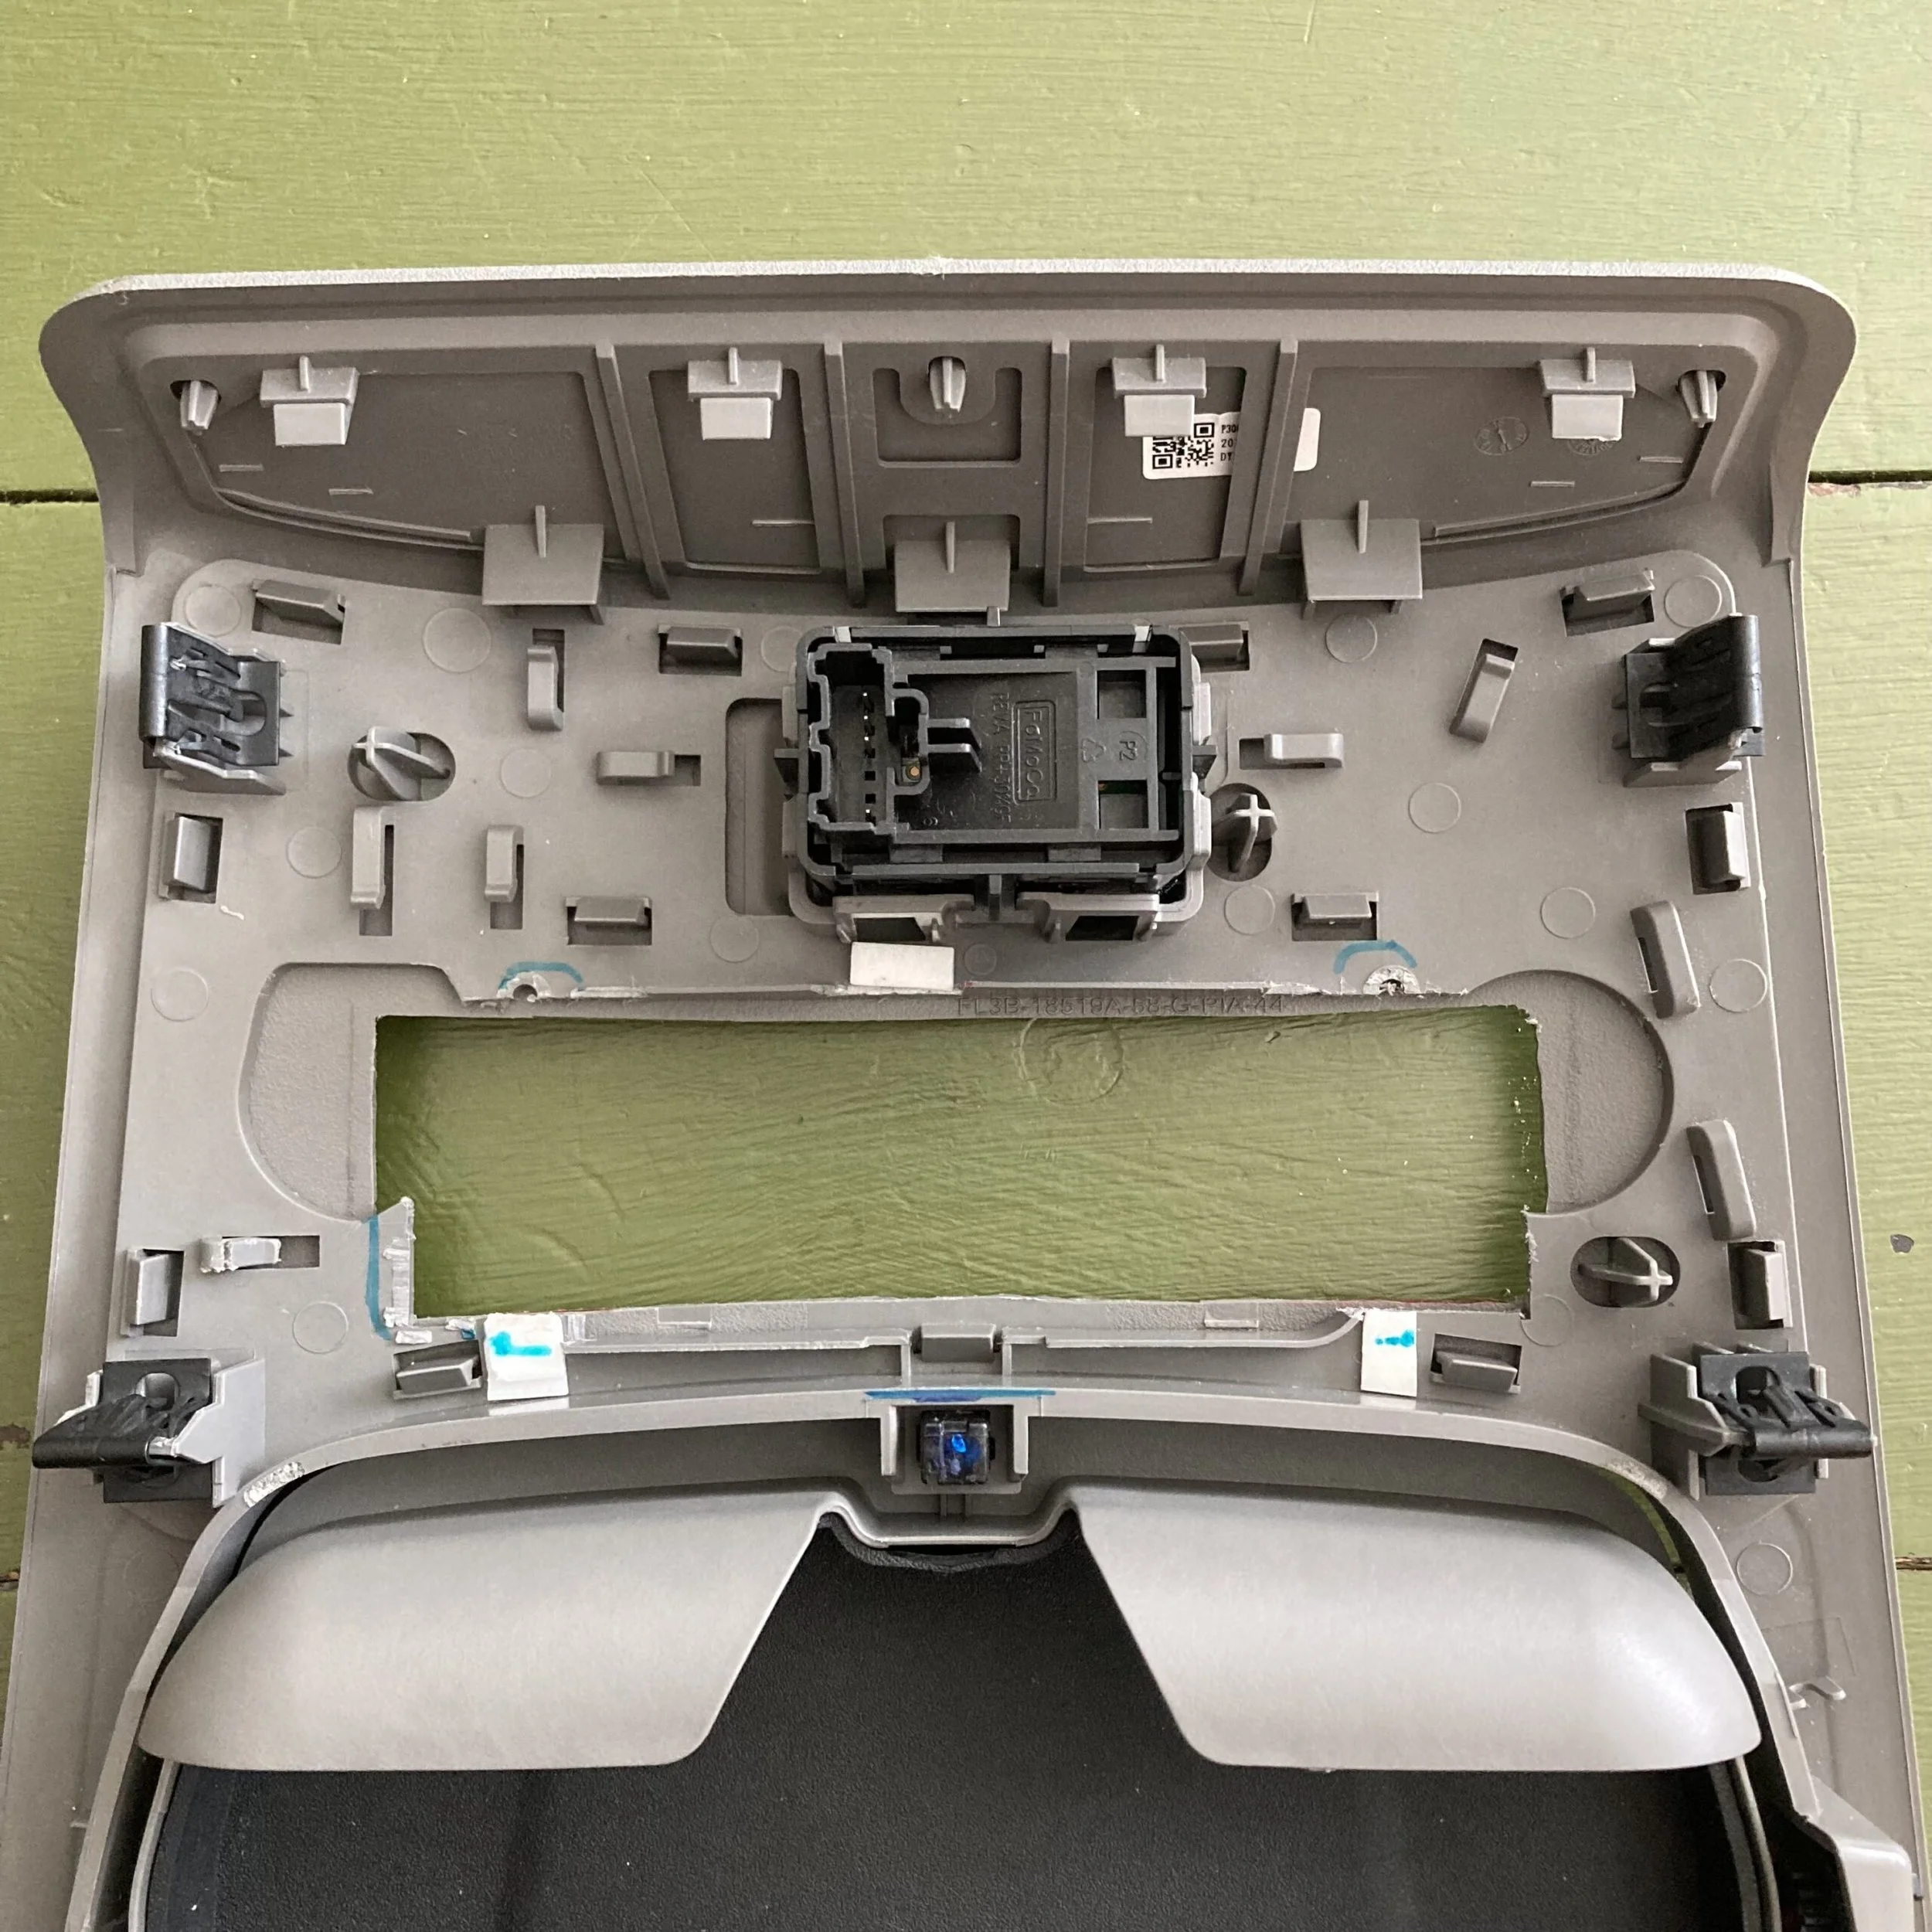
7. Reinsert the mesh patterned piece back into the overhead console to replicate the opening for the upfitter switches in the overhead console itself. Repeat step 6 using your previous cut as a template. Locating pins and small knobs might interfere with your placement of the upfitter switches. Cut or sand those down as needed. Higher-trimmed trucks have a sensor kit built into the overhead console and working around those will take some original thinking. Remove the mesh patterned piece again in preparation for the next step.
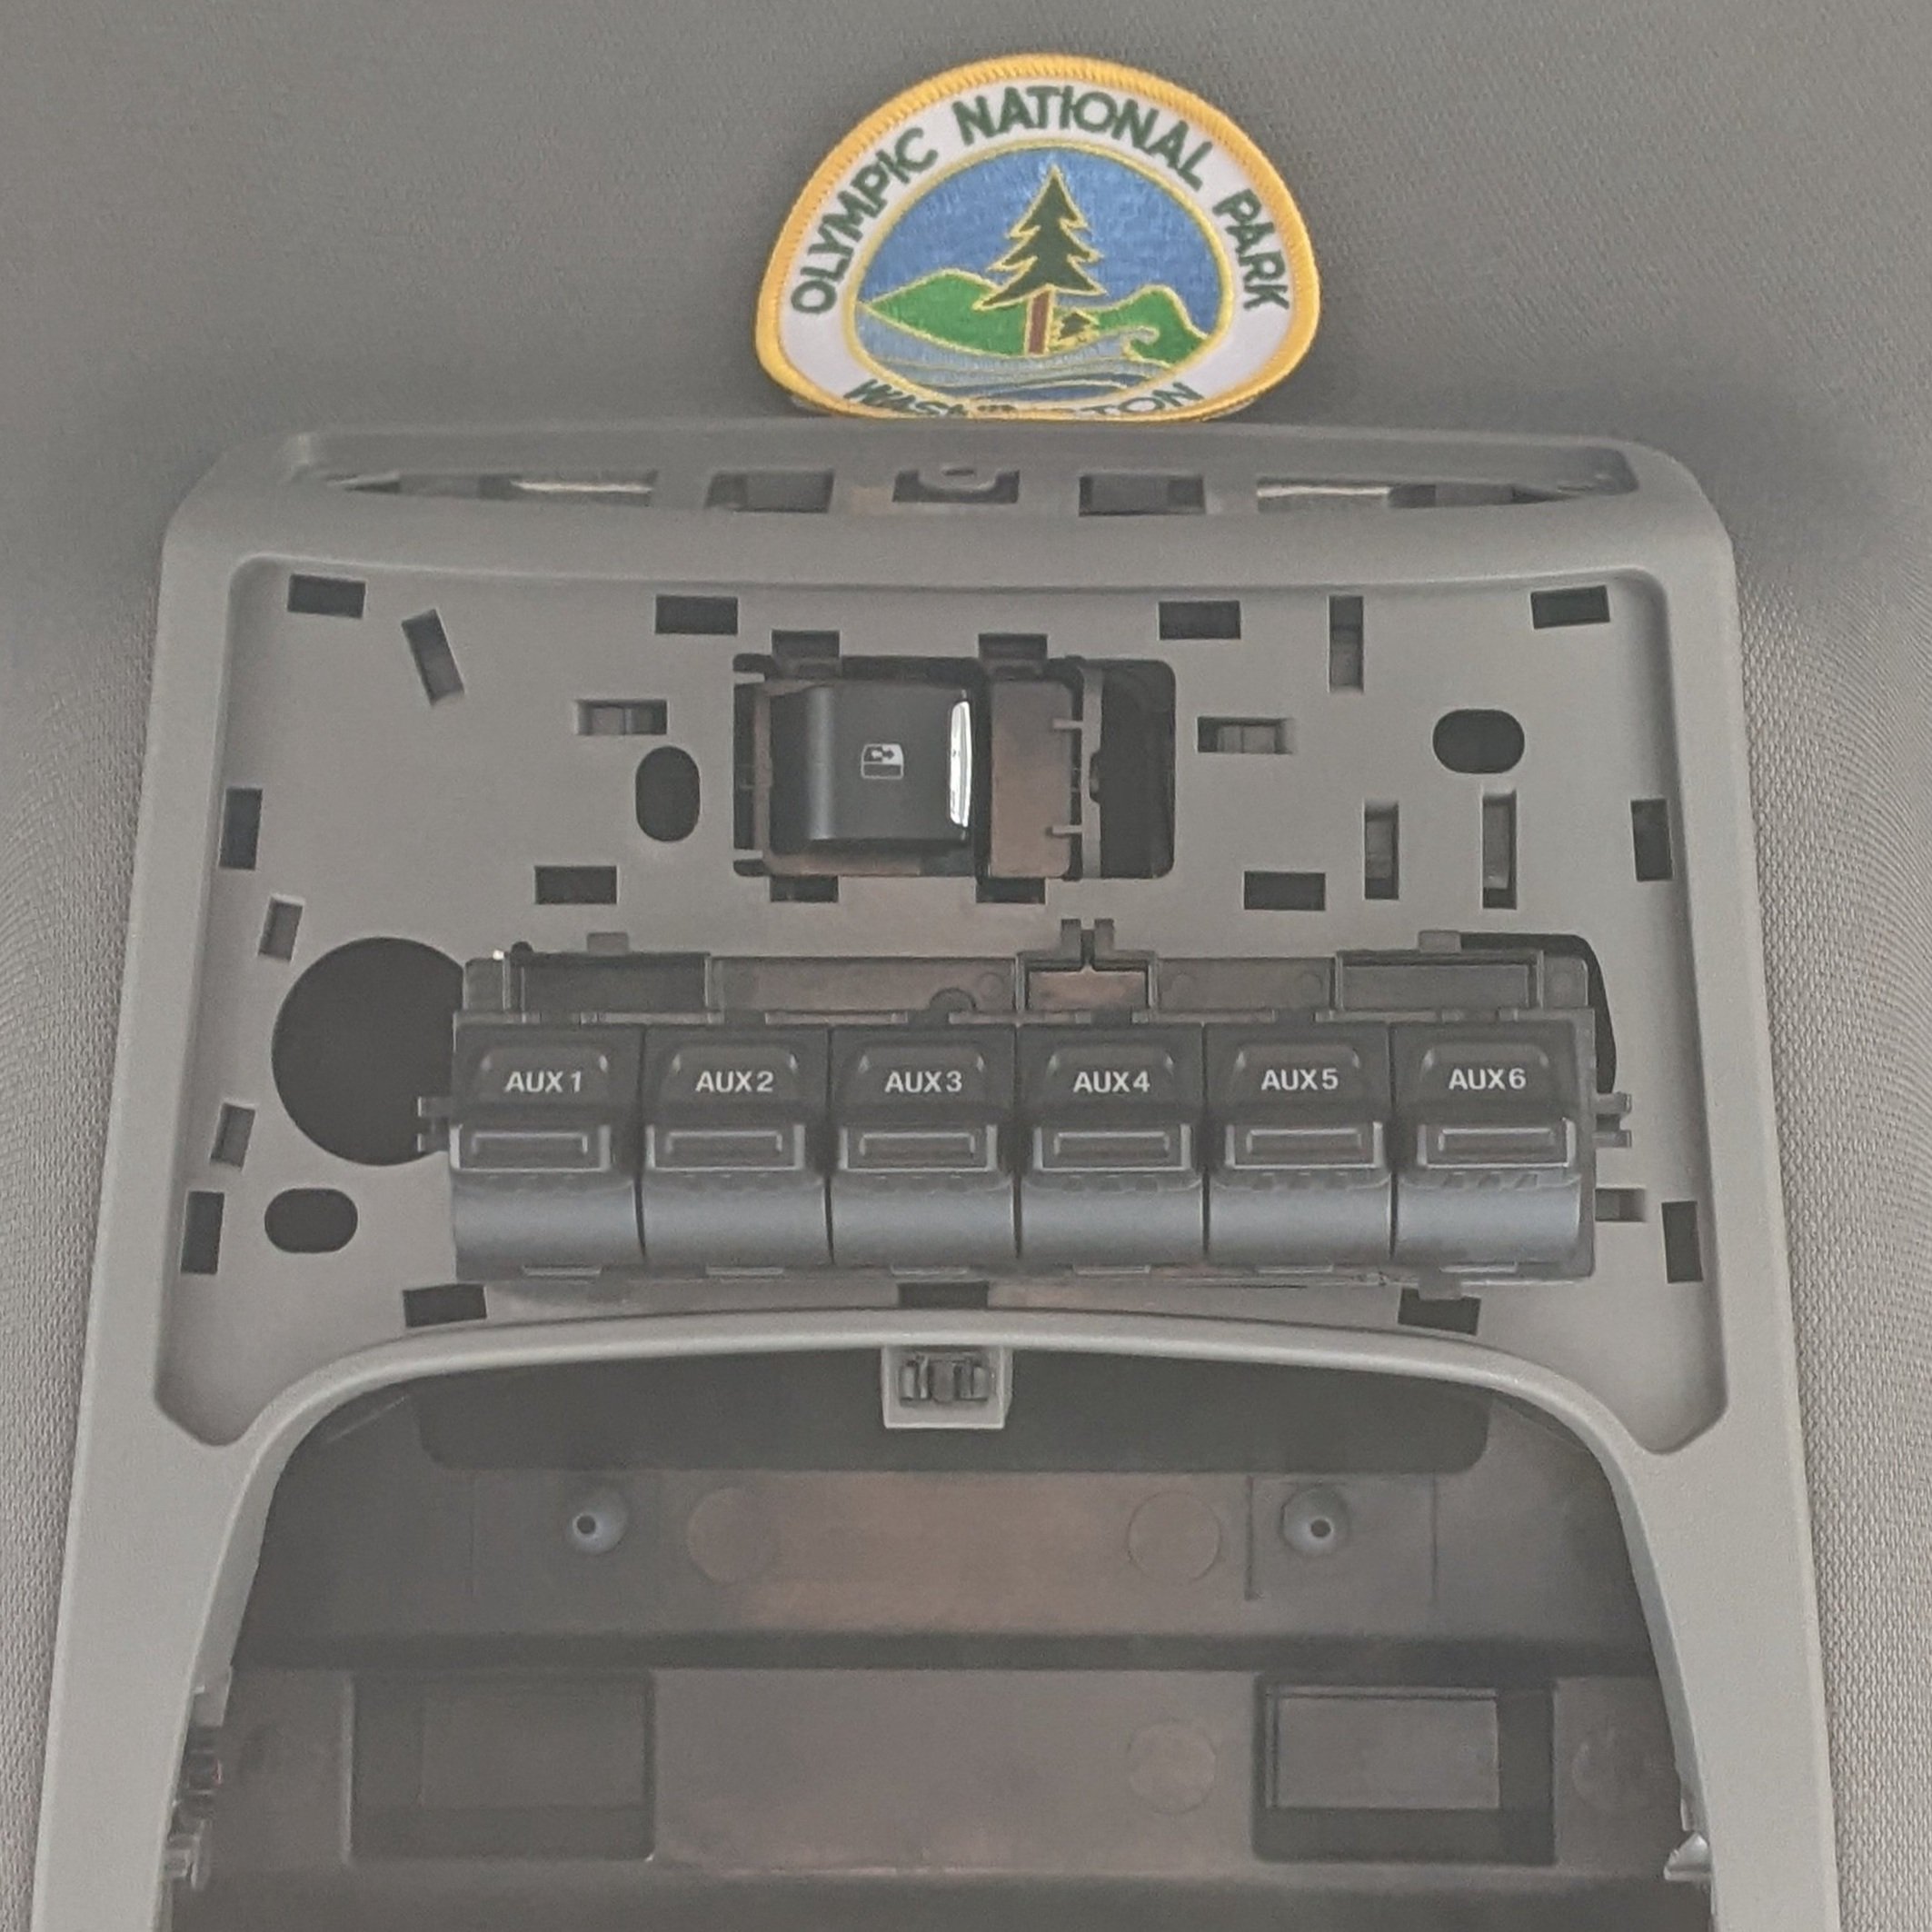
8. Place the upfitter switches in the opening you have made in the overhead console. Once it is located where you want it, make some marks with a permanent marker in order to place it back in the same place in the next step.
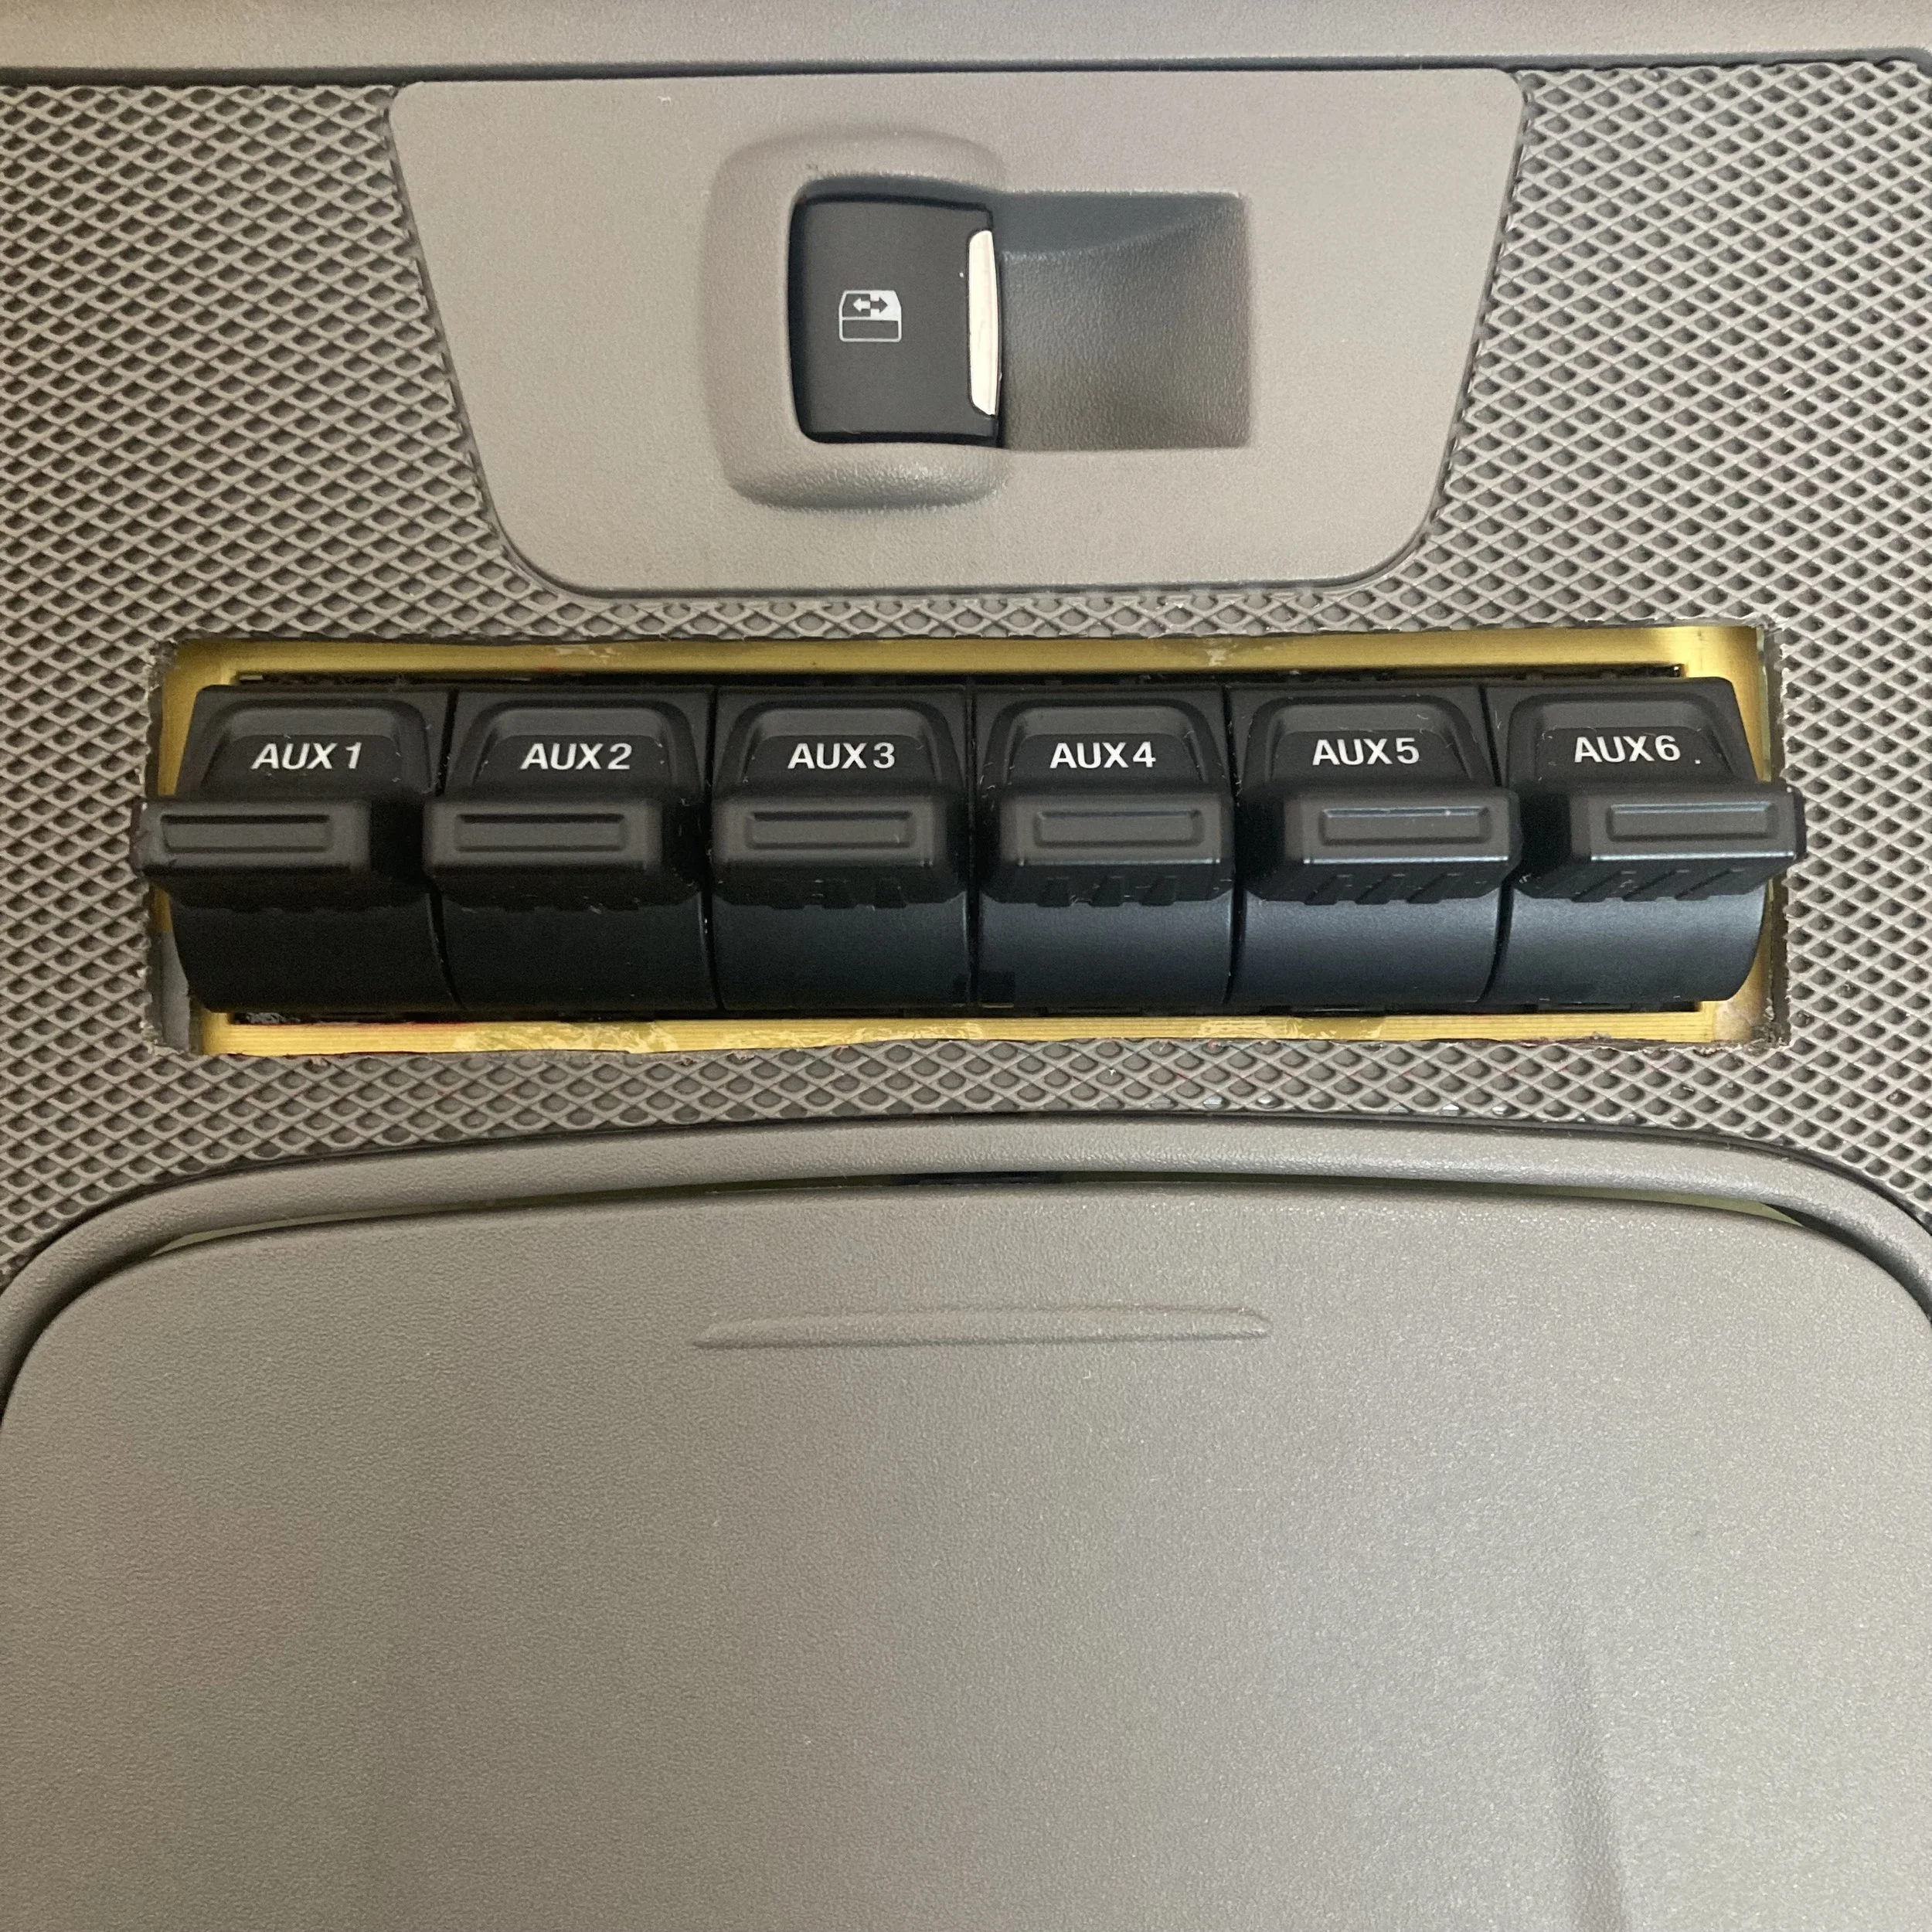
9. Apply Superglue along the edge of the opening you made. Insert the upfitter switches and make sure they are centered. Use tape and the previous marks you made to temporality secure them into place. Double-check the alignment before spraying the activator. You will have a tiny window to make any last-second adjustments before it all sets in place. If needed (for strength or peace of mind), you can apply more Superglue along the perimeter of the bonded pieces and respray with the activator to strengthen the bond.
**Ignore the yellow piece surrounding the upfitter switches. These are 3D-printed spacers I had to make since I made the opening too large.**
Price (estimate):
Ford OEM upfitter switches | $45-80, eBay
Mini hacksaw | $17.97 Home Depot; $6 Amazon
Tape | $9.68 Home Depot; $7.88 Amazon
File | $11.97 Home Depot; $7.99
Superglue | $7.98; $8.98 Amazon
Activator | $16.50 Amazon
TOTAL: $109.1 – $144.1 Home Depot | $92.35 – $127.35 Amazon
Prices are accurate as of publication and do not take into account any tools I already had on hand.